Pull Up Bar Home Gym Setup Guide: Build a Solid Strength Training Station

Setting up a pull up bar at home is one of the most practical investments you can make for your training. Whether you're focused on building upper body strength, improving grip endurance, or following a military-style discipline, a pull up bar is a versatile and foundational piece of equipment. This pull up bar home gym setup guide covers everything you need, from choosing the right bar to installation and workout programming.
Why a Pull Up Bar Is a Must-Have for Your Home Gym
Pull ups target multiple muscle groups simultaneously, including your back, shoulders, arms, and core. A home pull up bar means you can train this movement anytime, without a gym membership or bulky machines.
- Full-body strength: Pull ups engage the lats, traps, biceps, and abs.
- Grip development: Vital for rucking, loaded carries, and military-style training.
- Convenience: No commuting, no waiting for equipment.
- Cost-effective: A pull up bar is one of the most affordable durable fitness investments you can make.
Types of Pull Up Bars for Your Home Gym
Understanding your options helps you choose what fits your space and how you train.
1. Doorway Pull Up Bars
Designed to fit inside a standard door frame without permanent installation. Good for renters or limited space.
- Pros: Easy to install and remove, portable, affordable.
- Cons: Limited weight capacity, less stable for advanced exercises.
2. Wall-Mounted Pull Up Bars
Bolted directly into wall studs, these bars offer superior stability and handle heavier loads and dynamic movements.
- Pros: Extremely sturdy, multiple grip positions, supports weighted pull ups.
- Cons: Requires drilling and permanent installation.
3. Ceiling-Mounted Pull Up Bars
Ideal for garages or basements with high ceilings. Provides clearance for kipping and more dynamic movements.
- Pros: Strong and durable, great for muscle-ups and kipping variations.
- Cons: More complex installation, requires solid ceiling joists.
4. Free-Standing Pull Up Rigs
For those with enough floor space, a free-standing rig offers maximum versatility, often including dip bars and other attachments.
- Pros: No wall damage, multi-exercise station.
- Cons: Higher cost, takes up more floor space.
Step-by-Step: Setting Up Your Pull Up Bar at Home
Step 1: Assess Your Space and Support Structure
Before purchasing, measure your intended installation area. Identify whether you have solid wall studs or ceiling joists to anchor securely.
- Use a stud finder to locate studs behind drywall.
- Ensure at least 24 inches of overhead clearance around the bar for full range of motion.
- Check ceiling height for ceiling-mounted options.
Step 2: Choose the Right Bar
Match your space and training goals to the bar type. For a permanent, heavy-duty setup, wall- or ceiling-mounted bars are best. For smaller spaces or temporary setups, doorway bars work.
Step 3: Gather Installation Tools
- Electric drill with appropriate bits
- Level
- Measuring tape
- Stud finder
- Wrench set
- Anchor bolts or lag screws (usually included with the bar)
Step 4: Mark and Drill Mounting Points
Following manufacturer instructions, mark mounting holes on the wall or ceiling. Use a level to ensure the bar will be perfectly horizontal. Drill pilot holes to prevent wood splitting.
Step 5: Mount the Bar
Attach the bar using lag bolts or anchors. Tighten all bolts firmly but avoid over-tightening, which can damage the mounting surface. Double-check stability before starting any workouts.
Step 6: Test Your Setup
Perform a few gentle hangs and basic pull ups to verify the bar is stable and safe. If you notice movement or creaking, revisit your installation before training on it.
Essential Accessories to Build Out Your Pull Up Home Gym
Resistance Bands
Battle Bands (resistance bands) are perfect for assisted pull ups and mobility stretching. They let you scale the difficulty as you build strength, making them useful for beginners and experienced athletes alike.
Hanging Ab Straps
Hanging Ab Straps attach to your pull up bar and let you perform hanging leg raises with better arm comfort and control. An effective way to add core work to your bar sessions.
Weighted Vest
To increase intensity once bodyweight pull ups feel manageable, add a Hybrid Weight Vest. This is one of the most effective ways to build military-grade pulling strength.
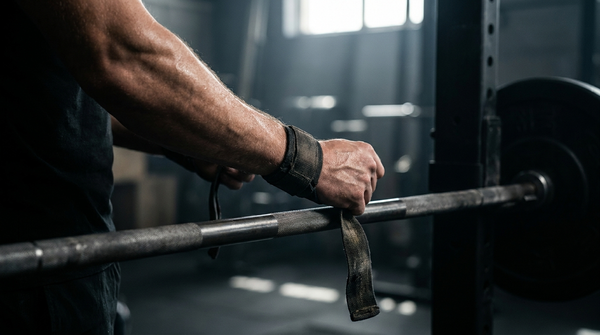
Lifting Straps
Battle Straps (lifting straps) are worth having for deadlifts and rows that pair with your pull up training. They let you focus on the target muscle rather than grip fatigue on accessory work.
Best Practices for Pull Up Training at Home
Warm Up Thoroughly
Activate your shoulders, back, and arms with dynamic stretches and light band pulls before attempting pull ups.
Focus on Form
Controlled movement beats sloppy reps every time. Avoid swinging or kipping unless training for specific skills.
Progress Gradually
Start with assisted pull ups or negatives if you're a beginner. Add reps, sets, or load over time as your strength develops.
Use Different Grips
Rotate between overhand, underhand, and neutral grips to target muscles from different angles and prevent plateaus.
Rest Between Sessions
Allow adequate recovery between intense pull up sessions to avoid overuse injuries and support muscle growth.
Sample Pull Up Bar Workout
- Warm-up: 5-10 minutes of jumping rope or dynamic stretching
- Assisted Pull ups: 3 sets of 8-10 reps (use bands if needed)
- Negative Pull ups: 3 sets of 5 reps (lower slowly, controlled)
- Chin ups (underhand grip): 3 sets of 6-8 reps
- Hanging leg raises: 3 sets of 10-15 reps for core
- Dead hangs: 3 sets of 20-30 seconds for grip
- Cooldown: Shoulder and lat stretches
Maintaining Your Pull Up Bar Setup
Regular maintenance keeps your setup safe and functional for years:
- Inspect bolts and anchors monthly for tightness.
- Clean the bar with mild detergent to remove sweat and grime.
- Check for rust or wear, especially in humid environments like garages.
Build Your Home Gym Around the Pull Up Bar
A well-installed pull up bar is more than a single piece of equipment. It's the centerpiece of a practical home strength training setup. Whether you're training for military-style fitness, hybrid workouts, or just want to build real upper body pulling strength, following this setup guide puts you in a good position from day one.
Explore Battle Bunker's training gear, including weighted vests, resistance bands, and hanging ab straps, to complete your pull up home gym setup. Shop now and build the training station your work ethic deserves.