Pull Up Bar Home Gym Setup Guide: How to Set Up Your Home Pull-Up Station

Creating a dedicated home gym space is one of the smartest moves you can make to stay consistent, motivated, and achieve serious results. At the core of any effective home gym setup is a quality pull up bar, an indispensable piece of equipment that helps build upper body strength, endurance, and functional fitness. Whether you’re a beginner or an experienced athlete, knowing how to choose, install, and optimize your pull up bar setup at home will builds new training potential.
In this comprehensive pull up bar home gym setup guide, we’ll cover everything from selecting the right pull up bar type, practical installation tips, essential accessories, and how to incorporate Battle Bunker training gear to get more out of your workouts. Let’s get you equipped to improve your training right from your own home.
Why a Pull Up Bar Is Essential for Your Home Gym
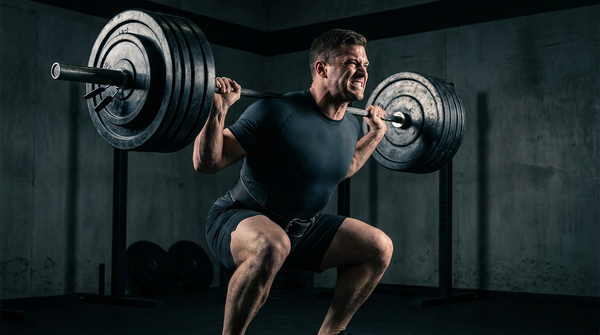
Pull ups are a foundational movement pattern that target multiple upper body muscle groups including the lats, biceps, shoulders, and core. Beyond pure strength, pull ups improve grip strength and functional movement, which translates directly into better performance in other lifts, running, rucking, and military-style training.
Having a pull up bar at home means you can:
- Train consistently: No need to wait for gym hours or equipment availability.
- Save space and money: Pull up bars are affordable and compact compared to bulky machines.
- Perform versatile workouts: From strict pull ups and chin ups to hanging leg raises and muscle-ups.
- Complement hybrid training: Integrate pull ups with running, rucking, and strength work for a well-rounded routine.
Choosing the Right Pull Up Bar for Your Home Gym
There are several pull up bar styles suited to different spaces, budgets, and training goals. Here are the most popular options and their pros and cons:
1. Wall-Mounted Pull Up Bars
Pros:
- Very sturdy and stable for heavy training.
- Allows for a variety of grips and attachments.
- Does not take up floor space.
Cons:
- Requires drilling into studs or masonry.
- Less portable and permanent installation.
Wall-mounted bars are ideal if you have a dedicated workout room or garage with solid walls. Look for models with multiple grip positions to diversify your workouts.
2. Doorway Pull Up Bars
Pros:
- Easy to install and remove without tools.
- Affordable and space-saving.
- Portable for renters or small spaces.
Cons:
- Weight and stability limitations, usually max 250-300 lbs.
- Can damage door frames if not installed properly.
- Limited grip options compared to wall bars.
Doorway bars are perfect for beginners or those with limited space. Always follow manufacturer guidelines for installation and weight limits.
3. Freestanding Pull Up Stations
Pros:
- Completely portable and adjustable.
- Often includes dip bars and other station features.
- No wall damage or drilling required.
Cons:
- Takes up more floor space.
- Usually more expensive than basic bars.
If you have the room and budget, freestanding stations provide versatility and durability for a wide range of exercises.
4. Ceiling-Mounted Pull Up Bars
Less common but highly stable, these bars are mounted to ceiling joists and can accommodate heavy training. Installation is more complex but worthwhile if you want a clean, unobstructed wall space.
Installation Tips for a Safe, Effective Pull Up Bar Setup
Safety is paramount when installing your pull up bar. Here are practical tips to ensure your setup is solid and secure:
- Find the right mounting points: Use a stud finder to locate wall studs or ceiling joists. Avoid drywall-only installations.
- Use proper hardware: Heavy-duty lag bolts or anchors that match the bar’s specifications will ensure stability.
- Follow weight limits: Check manufacturer guidelines and never exceed maximum capacity.
- Clear surrounding space: Make sure there’s enough room around the bar for full range of motion and additional equipment.
- Test stability: Before your first workout, hang from the bar with your full body weight and check for movement or creaking.
Optimizing Your Pull Up Workouts with Battle Bunker Training Gear
Once your pull up bar is installed, supplement your training with Battle Bunker gear built for performance and durability. Here’s how to integrate our equipment:
Resistance Bands
Resistance bands are a solid tool for pull ups. Use them for:
- Assisted pull ups: Loop a band around the bar and place your foot or knee inside to reduce load and build strength gradually.
- Progressive overload: Add bands to increase resistance during negative reps or pull up variations.
- Warm-up and mobility: Use bands for shoulder activation and dynamic stretches before training.
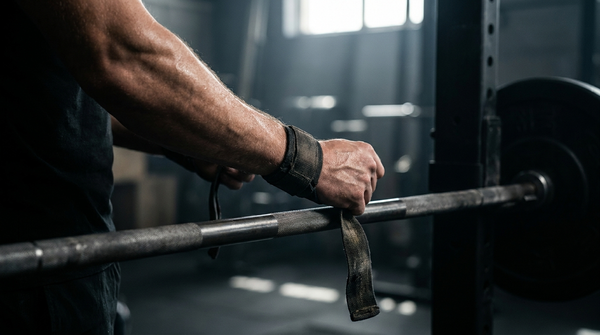
Wrist Wraps and Lifting Straps
Protect your wrists and improve grip endurance during high-volume sets or weighted pull ups with:
- Wrist wraps: Provide joint stability to prevent injury and support heavy lifts.
- Lifting straps: Help maintain grip on the bar when your hands fatigue, allowing you to focus on pulling strength.
Ab Straps
Attach ab straps to your pull up bar for hanging leg raises and core-focused exercises. They allow you to isolate your abs without overloading your grip or arms, complementing your pull up strength with powerful core development.
Additional Home Gym Essentials to Complement Your Pull Up Bar Setup
To fully embrace hybrid training and military-style discipline, consider adding these items to your home gym alongside your pull up bar:
- Adjustable dumbbells or kettlebells: For strength and conditioning circuits.
- Weighted vest: Add resistance during pull ups, push ups, and rucking drills.
- Rucksack: Essential for ruck training and endurance building.
- Jump rope: For cardio, coordination, and warm-up routines.
- Floor mats or rubber flooring: Protect your floor and provide cushioning during workouts.
Top Pull Up Bar Exercises to Master at Home
get more out of your home gym setup with a variety of pull up bar exercises that build strength, endurance, and functional fitness:
- Standard pull ups: Focus on controlled reps, full range of motion, and scapular engagement.
- Chin ups: Target biceps and chest with underhand grip.
- Neutral grip pull ups: Use parallel handles if available for shoulder-friendly variation.
- Hanging leg raises: Use ab straps or hang from the bar to develop core strength.
- Muscle ups: Advanced move combining pull up and dip, build up with progressions.
- Commando pull ups: Alternate side-to-side grip to challenge coordination and grip.
- Negative pull ups: Slow eccentric lowering to build strength.
Maintaining Your Pull Up Bar and Accessories
Keep your home gym equipment in top shape with these maintenance tips:
- Regularly check hardware: Tighten bolts and inspect mounts to prevent accidents.
- Clean grip surfaces: Wipe down bars after use to remove sweat and improve grip.
- Inspect Battle Bunker gear: Check resistance bands and straps for wear or tears.
- Store accessories properly: Hang bands and straps to avoid tangling or degradation.
Conclusion: Take Your Home Gym to the next step
Investing in a quality pull up bar home gym setup is a powerful step toward achieving your fitness goals. With the right equipment, proper installation, and smart use of Battle Bunker training gear like resistance bands, wrist wraps, lifting straps, and ab straps, you can build a versatile, durable training space that supports strength, endurance, and functional fitness.
Don’t wait for a gym membership or perfect conditions, start building your strength and confidence today. Explore Battle Bunker’s full range of fitness equipment and training programs designed to improve your hybrid training, military-style discipline, and overall performance. Gear up, get after it, and transform your home gym into a battle bunker for success.