How to Use a Lifting Belt: Placement, Bracing, and When to Strap In

Learning how to use a lifting belt correctly can be the difference between a productive training session and one that puts you on the bench for weeks. A belt is a tool, not a crutch, and most people who own one either overuse it, underuse it, or wrap it on wrong and wonder why it feels uncomfortable. This guide cuts through the noise.
What a Lifting Belt Actually Does
A lifting belt does not support your spine by holding it in place from the outside. That is a common misconception. What it actually does is give your core something to push against. When you brace your abs into the belt, you create intra-abdominal pressure, which stabilizes your spine from the inside out. Think of your torso as a can of soda. The belt keeps the can rigid so it does not buckle under load.
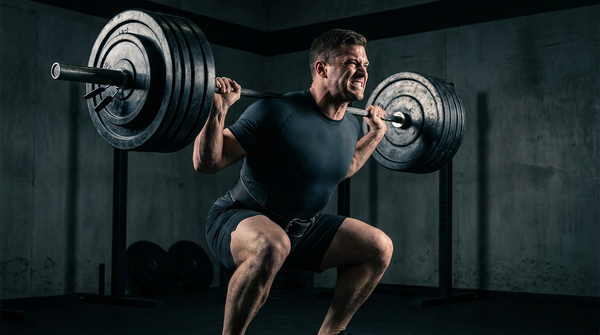
This matters most on heavy compound lifts like deadlifts, squats, and overhead presses, where spinal loading is significant and form breakdown under fatigue is a real risk.
When to Use a Lifting Belt
Not every set needs a belt. Here is a practical breakdown:
- Use it on heavy sets: When you are working at 80% of your max or higher, or anytime you are pushing near your limits on a compound movement.
- Skip it on lighter work: Warm-up sets, accessory work, and conditioning circuits do not require a belt. Training without one on lower-intensity work actually builds the core strength that supports your heavy lifting.
- Use it when form is at risk: If you notice your lower back rounding or your core caving during a set, a belt helps reinforce proper position, but it should not be used to mask a technique problem you are not working to fix.
The Battle Bunker Hybrid Belt uses a self-locking lever mechanism, which makes it fast to tighten between sets and easy to release without fumbling with a buckle when you are breathing hard between heavy pulls.
How to Put On a Lifting Belt Correctly
Belt placement matters more than most people think. Here is how to do it right:
- Position the belt over your navel: Center the belt across your belly button, not down around your hips. The goal is to cover your lower spine and the majority of your core.
- Tighten to the right tension: You want it snug enough that you feel resistance when you breathe into your belly, but not so tight that it cuts into your hip flexors or prevents a full breath. A good rule: if you cannot take a full diaphragmatic breath, loosen it one notch.
- Brace before the lift, not after: Once the belt is on, take a deep breath into your belly, brace your core hard against the belt like you are about to take a punch, and hold that tension throughout the lift. Releasing the brace mid-rep is where most injuries happen.
The Breathing and Bracing Technique
The Valsalva maneuver is the technical term for what you should be doing. Here is the simple version:
- Take a big breath into your belly, not your chest.
- Hold that breath and brace your core hard.
- Execute the lift.
- Exhale at the top of the movement or during the easiest phase of the rep.
When done with a belt, this creates significantly more intra-abdominal pressure than bracing alone. For max efforts, hold your breath the entire rep. For sets of five or more, exhale and re-brace between reps at the top position.
How Tight Should a Lifting Belt Be?
The most common mistake is cinching the belt down as tight as possible and then trying to lift. This limits your ability to brace because it prevents you from expanding your belly outward.
The correct tightness: if you can slide a few fingers between the belt and your body while standing relaxed, but the belt creates meaningful resistance when you breathe deep into your belly, you are in the right range. It should feel like it is working with your breath, not against it.
Lever belts like the Hybrid Belt let you set a consistent tightness every single session. You flip the lever to the same position every time and the tension is repeatable, which removes a variable during heavy training.
Which Lifts Benefit Most from a Belt
Not all movements need a belt equally. Here is a practical breakdown:
- Deadlifts: High benefit. Heavy pulls place serious demand on lumbar stability. A belt helps on max efforts and heavy sets of three to five.
- Squats: High benefit. Back squats in particular place your spine under load from the top down. Belted squats allow higher intra-abdominal pressure for the duration of the descent and ascent.
- Overhead press: Moderate benefit. Heavy pressing overhead requires a stable, neutral spine. A belt helps experienced lifters maintain that position under fatigue.
- Romanian deadlifts and good mornings: Low to moderate benefit. Useful when going heavy, but these movements also benefit from controlled core engagement without a belt.
- Rows and pulls: Generally not needed unless the load is significant and your lower back is compensating.
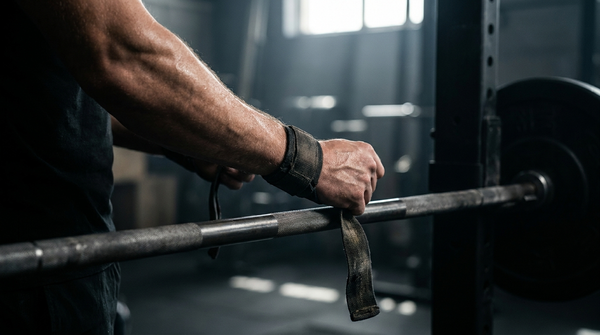
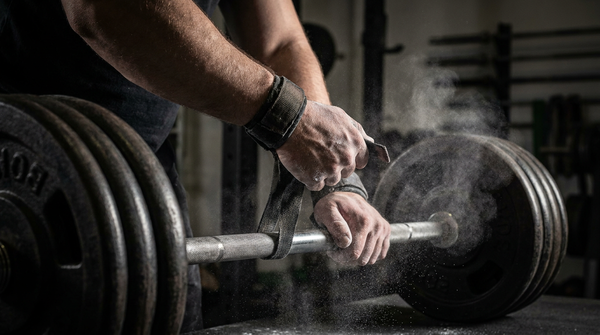
If you are also using lifting straps on your heavy pulls, pairing them with a belt is standard practice among serious strength athletes. The straps handle grip so your focus stays on bracing and pulling mechanics.
Common Mistakes to Avoid
- Wearing it too low: A belt around your hips is not protecting your lumbar spine. Keep it centered over your navel.
- Using it as a substitute for core training: The belt amplifies good bracing technique. It does not create it. Train your core without a belt regularly.
- Forgetting to brace: Putting on a belt and not actively bracing into it is nearly pointless. The belt works because of the pressure you create against it.
- Using it on every single set: You will not build the stabilizing muscles you need for longevity in training. Reserve the belt for when it counts.
- Tightening it so much you cannot breathe: A belt that restricts your inhale defeats its own purpose. You need the breath to create the pressure.
Leather Belt vs Nylon Belt vs Lever Belt
There are three main types worth knowing:
- Leather powerlifting belt: Stiff, durable, consistent. Takes time to break in. Best for pure strength athletes who deadlift and squat heavy with minimal movement between exercises.
- Nylon belt: Flexible, comfortable, fast to put on and take off. Good for functional fitness and hybrid athletes who need to move through multiple exercises quickly.
- Lever belt: The most consistent option for strength athletes. The lever locks in at exactly the same tension every session. The Battle Bunker Hybrid Belt uses this mechanism and is built to handle both heavy barbell work and functional training demands without slowing you down.
Building Up to Belt Use
If you are newer to lifting, spend time building core strength without a belt first. Learn to brace properly in bodyweight and lighter loaded movements. Once you are consistently handling weights that challenge your capacity for spinal stability, adding a belt starts to pay real dividends.
A solid baseline: if you can deadlift your bodyweight with clean form and a consistent brace, you are at a stage where belt training makes sense on your heavier working sets.
The Bottom Line
A lifting belt is one of the most useful tools in a serious lifter's kit, as long as you understand what it does and how to use it. Center it over your navel, brace hard into it on every heavy rep, use it for the sets that require it, and build your core strength on the days you train without it. That combination will keep you lifting heavy for the long term.
The Battle Bunker Hybrid Belt is built for athletes who train hard across disciplines. Whether you are pulling heavy deadlifts or pressing overhead, it gives you the stability and speed to train at a high level without slowing down between sets. You can pair it with the Strength Bundle to get your belt, lifting straps, and wrist wraps together at a better price.