How to Do Weighted Pull Ups: Step-by-Step Guide for Strength & Power

If you've built a solid base of bodyweight pull-ups and want to keep progressing, learning how to do weighted pull ups is the logical next step. Adding resistance increases strength and muscle size in ways that bodyweight reps alone can't achieve once you're past the beginner stage. This guide covers everything: proper form, how to add weight safely, gear that helps, and how to program weighted pull-ups into your training.
Why Weighted Pull-Ups Matter
Bodyweight pull-ups have a ceiling. Once you're cranking out 15+ clean reps, you've entered endurance territory. Adding load shifts the stimulus back toward strength and hypertrophy. Weighted pull-ups:
- Build greater upper body strength, especially lats, biceps, and traps
- Increase muscle size in the back more effectively at higher rep ranges than bodyweight alone
- Improve grip and core stability when performed with good technique
- Carry over to advanced calisthenics: muscle-ups, front levers, and one-arm progressions
- Directly support rucking performance and general upper body pulling strength
But added load amplifies any existing form issues. Sloppy form without weight leads to slower progress. Sloppy form with weight leads to injury. Get the technique right before adding plates.
What You Need Before Starting
1. A Solid Pull-Up Bar
The bar needs to support your bodyweight plus added load. Make sure it's rated appropriately and mounted or braced securely before you start loading weight below it.
2. How to Add Weight
The most common options:
- Weight belt with plates or chains (keeps load centered, allows full range of motion)
- Battle Bunker Hybrid Weight Vest (hands-free, distributes load evenly)
- Backpack loaded with weight plates or a sandbag
A weight belt with a plate is the most adjustable option. A vest works well if you want to keep hands and arms completely free and add the same load to other movements in the same session.
3. Supporting Gear
Grip and wrist health become more important as load increases:
- Wrist wraps: Battle Wraps provide joint support during heavy sets and reduce wear on the wrist joint over time.
- Lifting straps: When grip is the limiting factor, Battle Straps keep your hold secure so your back and arms can finish the set properly.
- Resistance bands: Battle Bands are useful for warm-up sets and building strength in the assisted range before moving to unassisted loaded work.
- Ab straps: If you're pairing pull-ups with hanging core work, ab straps reduce grip fatigue so the core exercises stay as the focus.
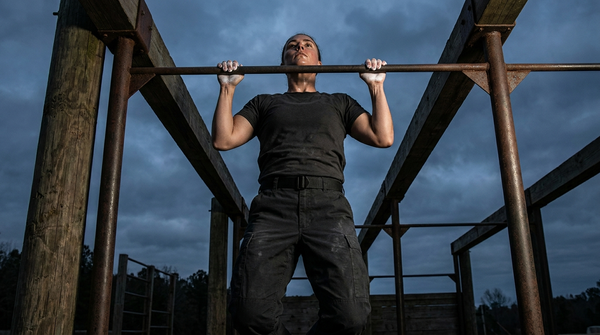
Step-by-Step: How to Do Weighted Pull-Ups
Step 1: Warm Up Properly
- 5-10 minutes of light cardio to raise body temperature
- Band-assisted pull-ups to activate the back and arms
- Dynamic shoulder stretches and scapular pull-ups to engage the right muscles before load
Step 2: Attach Your Weight
- Secure your belt or vest snugly before stepping to the bar
- Start light: 5-10 lbs above bodyweight on your first weighted session
- Confirm full range of motion isn't restricted by the setup
Step 3: Grip the Bar
- Shoulder-width overhand grip (pronated)
- Thumbs wrapped around the bar for a secure hold
- Use lifting straps if grip is likely to fail before your back muscles are finished
Step 4: Execute the Pull-Up
- Start in a dead hang with shoulders engaged and packed down, not shrugged
- Initiate the pull by retracting the shoulder blades and driving elbows toward your hips
- Keep the core tight and legs crossed or slightly bent for stability
- Get your chin over the bar, or chest to bar for fuller range
- Lower under control until arms are fully extended, no dropping from the top
Step 5: Breathe and Recover Between Sets
- Exhale on the way up, inhale on the way down
- Prioritize quality over rep count. A clean rep with control beats three sloppy ones.
- Rest 90-120 seconds between sets for strength work
Common Mistakes to Fix
- Swinging for momentum: Reduces lat engagement and shifts load to joints. Control the movement from start to finish.
- Partial range: Not going fully down limits strength gains in the stretched position. Use the full range consistently.
- Adding weight too quickly: Progress in small increments. 2.5-5 lb jumps are appropriate. Big jumps cause form breakdown.
- Ignoring grip support: If your hands give out before your back is done, that's not a productive set. Use lifting straps to fix it.
- Skipping the warm-up: Cold muscles and connective tissue under weighted load is how injuries happen. Always prime the system first.
How to Progress Over Time
Once you're stable at a given weight for 3-5 clean reps across multiple sets, it's time to add load:
- Add 2.5-5 lbs at the next session, maintain the same rep target
- Increase reps per set before increasing load when you're in a volume phase
- Add pauses at the top for increased time under tension without adding weight
- Vary grip: chin-up (underhand), wide-grip, neutral-grip for different angles and muscle emphasis
- Use resistance bands for negative-only reps or explosive pull-ups as supplemental work
Keep a training log. Recording weight, reps, and notes on form makes it easy to see where you're progressing and where you've stalled.
Pairing Weighted Pull-Ups with Broader Training
Weighted pull-ups fit naturally into a hybrid program that also includes rucking, running, and conditioning work:
- Pair heavy pull-up days with rucking for grip and back endurance carry-over
- Use resistance bands on lighter days for volume without joint stress
- Add hanging ab work with ab straps at the end of pull-up sessions for efficient core training
- Keep cardio separate enough that it doesn't bleed into your strength session recovery
Final Word
Now you know how to do weighted pull-ups correctly. Start light, focus on clean reps, and use wrist wraps and lifting straps to keep your joints protected and your grip from becoming the weak link. Steady progression over months, not weeks, is what builds real upper body strength. Show up, add weight when you've earned it, and track everything.